User-Entered Date
If the operator must manually enter a date, then Design can constrain these dates to a range of dates that can be selected from, rather than manually keyed in.
The following example shows the procedure to create a date field and calculate a range of dates based on it. The operator can chose a date from this calculated range, during job selection.
|
1.
|
Select the printer model DataFlex 6230 Continuous and variant 32mm as shown in the figure. Select the New Blank Template from the job list. Click on Edit to create a new job. |

|
2.
|
Name the file as ‘User entd date’. Note that this will be the name of the job in the printer for selection, once we transfer this message to the printer. |
|
3.
|
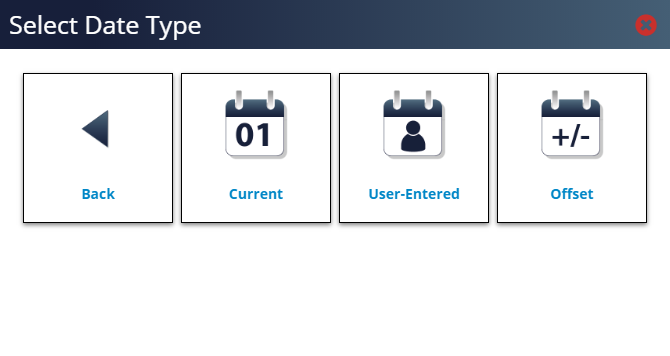
The image design area opens, click + on the toolbar and select Date from the field type list. Select User-Entered from the ‘Select Date Type’ window (See the figure). Selecting this option ensures that the printer will prompt for a date selection during job set up. |
|
4.
|
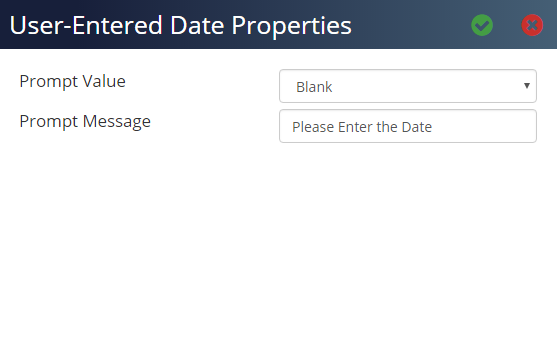
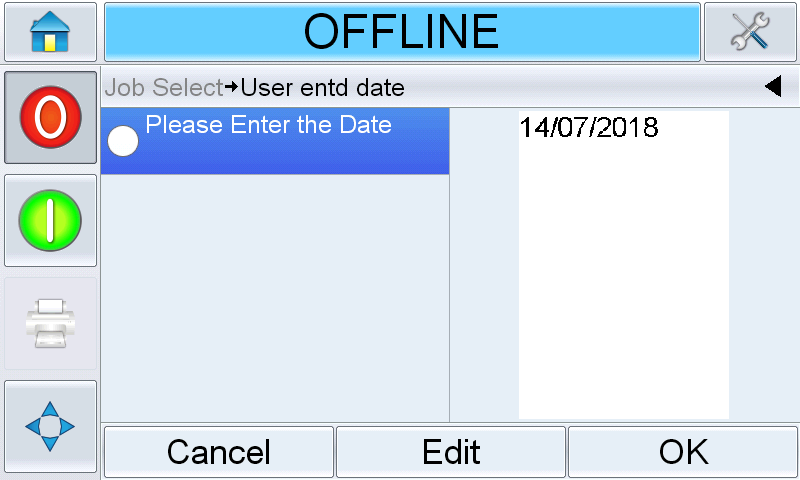
Enter a prompt message that is to be displayed when the operator selects the job (Please Enter the Date in this example) and click ✓. Leave the Prompt Value ‘Blank’ in this example. The Last Value or Default Value can also be used as a prompt during job set up. |
|
5.
|
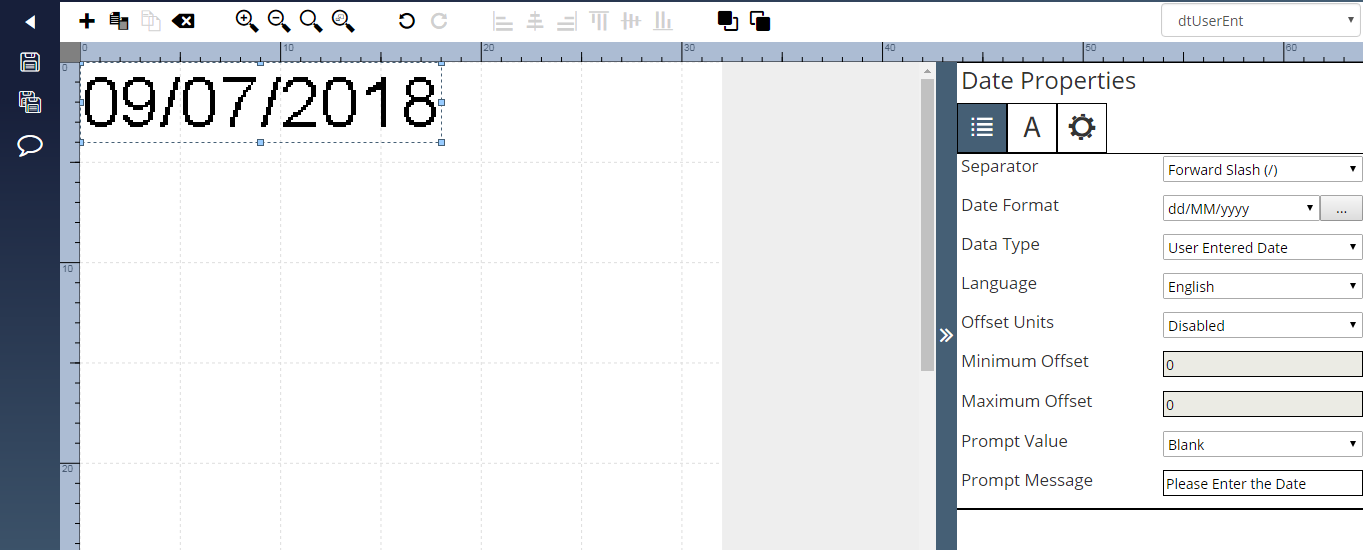
In the Field Name window, give this field a unique meaningful name (‘dtUserEnt’ in this example). Design places the current date on the image design area and displays the Date Properties window (See the figure). |
|
6.
|
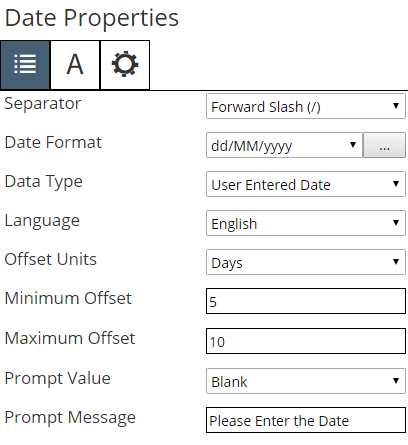
In this example, we will generate a date using a date offset. A date offset is calculated from an offset value, which can be a number of days, months or years. We will generate a date, or range of dates using a defined offset period from the base date, defined in Step 6 (printer date). |
Select Days from the Offset Units drop down list.
|
7.
|
Select the minimum offset as ‘5’ and maximum offset as ‘10’. Design calculates the offset dates based on the printer date. The operator will only be able to select a date between these calculated offset dates. |
In this example, the operator will be able to select a date between 5 days and 10 days from the current date in the printer during job selection for printing.
|
8.
|
In the Font tab, select the option 12 from the Font Size drop down list. |
|
9.
|
Save the job file to the application and click Back to return to home page. The job ‘User entd date’ date is added to the job list under DataFlex 6230 Continuous and variant 32mm. |
|
10.
|
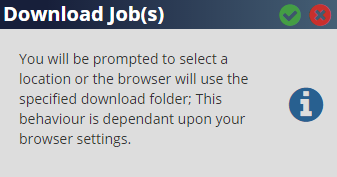
Click on User entd date and then on Download on the job toolbar. The Download Job(s) window appears: |
|
11.
|
Click ✓ and then standard Windows save window will open to select the required storage selection. |
|
12.
|
Confirm the file name and the file type (.zjf) is correct. Click Save to save the job to the required location. |
|
13.
|
Insert the USB memory stick into the PC. |
|
14.
|
Copy the file ‘User entd date.zjf’ and paste it to the USB device. |
|
15.
|
Remove the USB memory stick from the PC. |
|
16.
|
Insert the USB memory stick into the printer. |
|
17.
|
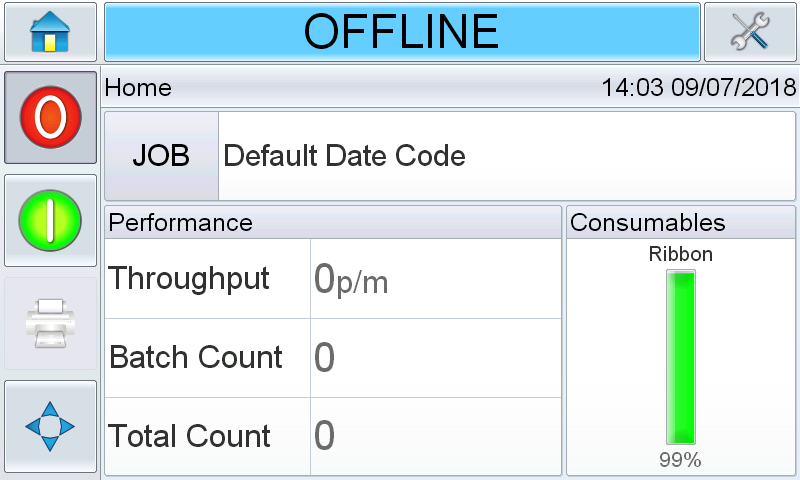
Turn on the printer. The printer will start up and on completion Home screen will be displayed (See the figure). |
|
18.
|
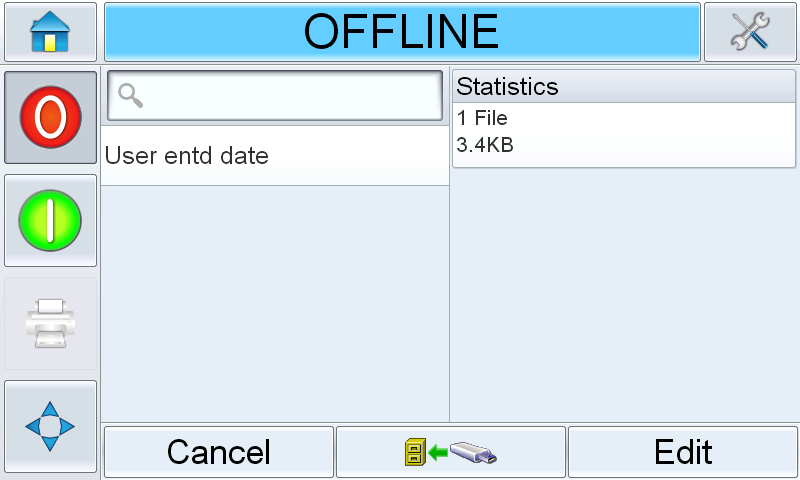
Login to the printer by selecting the required role and entering the password. Navigate to Tools > Databases. The database screen displays the External Database. Touch External to view all the jobs in the USB device (See the figure). |
|
19.
|
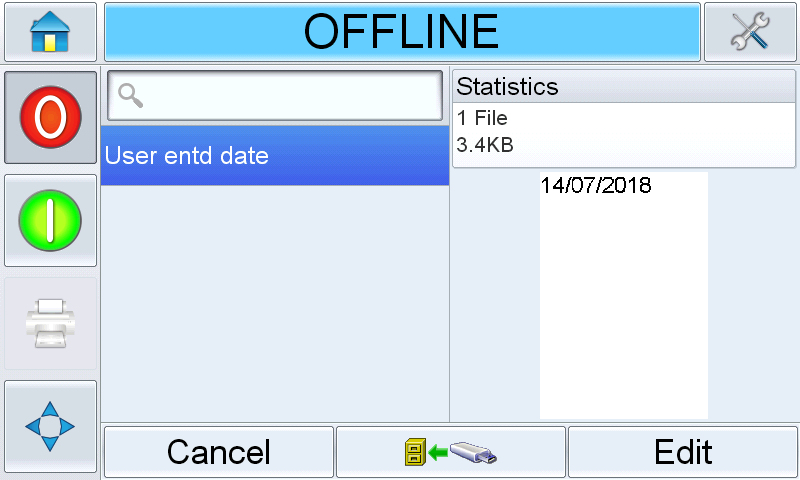
Touch on the job you require, the file size is displayed. Touch Send Job to Database button to import the file from USB to printer (See the figure). |
|
20.
|
Touch the Job button. The transferred job appears in the job select list. Note that the job name ‘User entd date’ is the same as the job file name given in Step 2. |

|
21.
|
Select the job and touch OK. |
|
23.
|
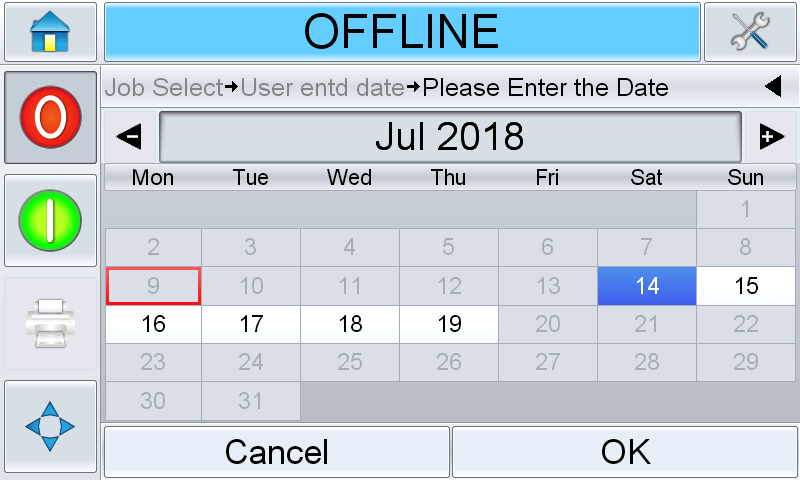
The printer calculates a range of dates that can be selected based on the current printer date and the offsets that we defined earlier. |
|
24.
|
Select the required date (14 in this example) from the available dates by touching the required date. The dates between the minimum and maximum offset days are displayed in blue and are available for selection. All other dates are disabled and cannot therefore be incorrectly selected by the operator. The current printer date is shown in a white circle and the current selection in dark grey. Touch OK. |
|
25.
|
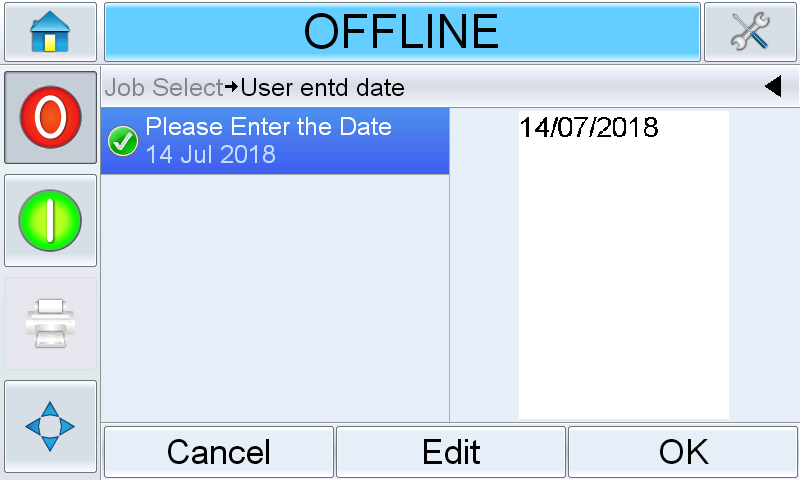
A tick mark appears showing that this user entered field has been completed. The date is changed to the selected date in the preview. |
|
26.
|
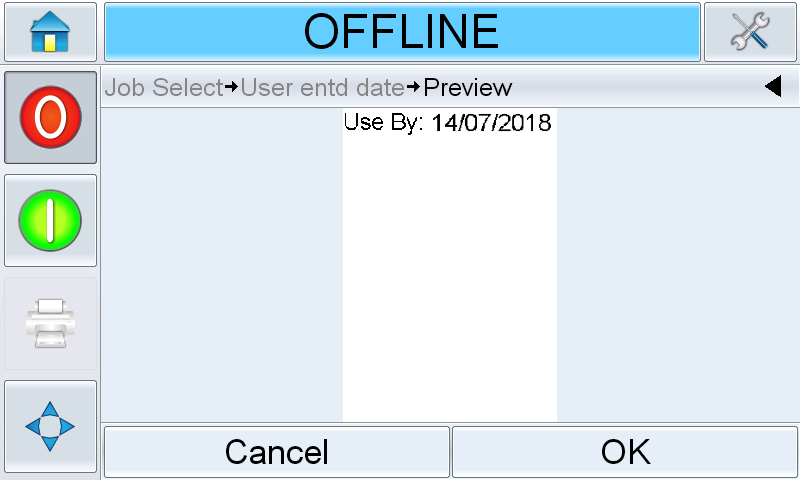
Touch OK. The print preview is displayed. |
|
27.
|
Touch OK to close the preview display. The job with the required date is now ready for printing. |
Date Offsets using Date Field Type
The following example shows how to setup date offsets using date field.
|
2.
|
Select the Printer Model as ‘Videojet 1860’ and Variant as ‘12-high’. Select the New Blank Template from the job list. Click Edit and name the job ‘Date Offset’. |
|
3.
|
Click + on the toolbar and select Date from the field type list. |
|
4.
|
Select Offset from the Select Date Type window. The Offset Date Properties window appears as follows: |
|
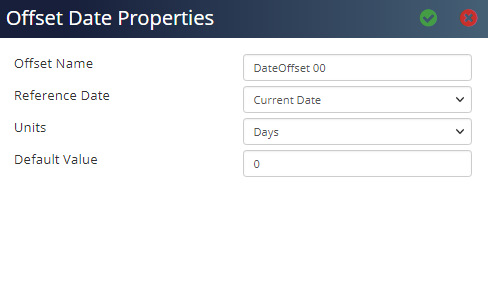
5.
|
Set the Offset Name as ‘date+10’ and Default Value as ‘10’. Keep other parameters default Reference Date as ‘Current Date’ and Units as ‘Days’. Click ✓. |
|
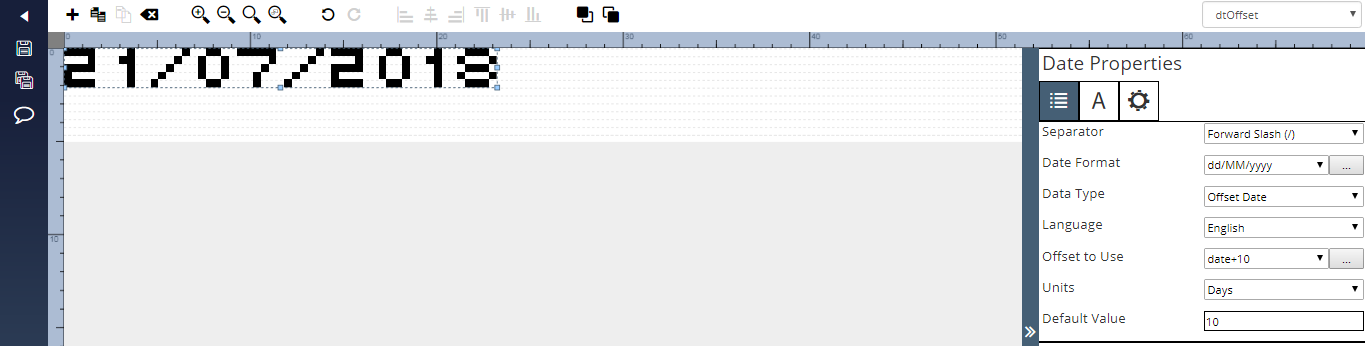
6.
|
Name this field as ‘dtOffset’ and click ✓. The image design area appears as follows: |
|
7.
|
Click Save to save the job file and then on Back to return to the Home page. |
Back to Top