Arabic Dates
The following example shows the procedure to create and select dates in the user interface language and print it in Arabic characters.
|
2.
|
Select the Printer Model as ‘Videojet 1860’ and Variant as ‘12-high’. Click Edit and name the job ‘arabic example’. |
|
3.
|
Click + on the toolbar and select Text tool in the toolbox. Name this field as ‘txtUseBy’ and click ✓. |
|
4.
|
From the Text Properties window, select Fixed from the Data Type drop down list and enter the text ‘Use By’ in the data box. |
|
5.
|
In the Font tab, select the font as 12-high international. |
|
6.
|
Click on the Date tool in the toolbox. Select User-Entered from the Select Date Type window. |
|
7.
|
Select the Prompt Value as ‘Default Value’ and Prompt Message as ‘Select the Date’. Name this field as ‘dtUseBy’ and click ✓. |
|
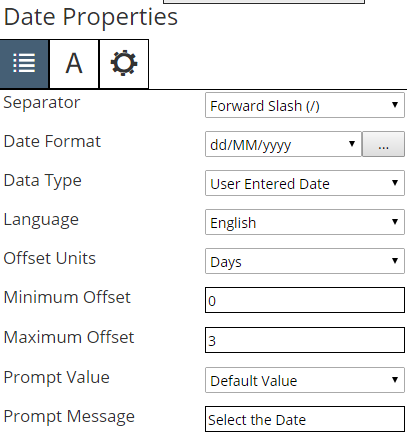
8.
|
From the Date Properties window, Select ‘Days’ from Offset Units drop down list. Set the Minimum Offset as ‘0’ days and Maximum Offset as ‘3’ days. |
|
9.
|
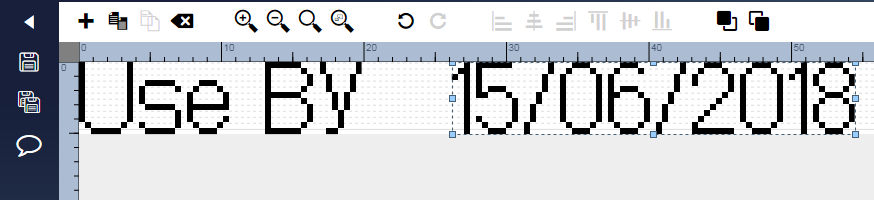
In the Font tab, select the font as 12-high international. The image design area appears as follows. |
|
10.
|
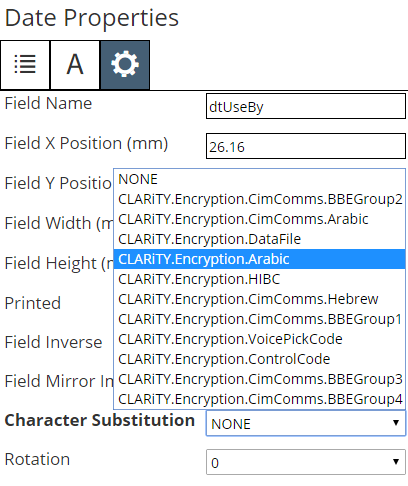
To change the date so that it appears in Arabic, double click on the date field and click on the General tab on the Date Properties window. |
|
11.
|
From the drop down list under Character Substitution, select CLARiTY.Encryption.Arabic. |
|
12.
|
Click on the Date tab and select the correct regional language from the Language drop down list. (Arabic - Saudi Arabia is selected for the example). |
|
13.
|
The image design area displays the date field in Arabic. |

|
14.
|
Save the job file to the application and click Back to return to home page. The job ‘arabic example’ date is added to the job list under Videojet 1860 and 12-high. |
|
15.
|
Click on User entd date and then on Download on the job toolbar. The Download Job(s) window appears. |
|
16.
|
Click ✓ and then standard Windows save window will open to select the required storage selection. |
|
17.
|
Confirm the file name and the file type (.zjf) is correct. Click Save to save the job to the required location. |
|
18.
|
Insert the USB memory stick into the PC. |
|
19.
|
Copy the file ‘arabic example.zjf’ and paste it to the USB device. |
|
20.
|
Remove the USB memory stick from the PC. |
|
21.
|
Insert the USB memory stick into the printer. |
|
22.
|
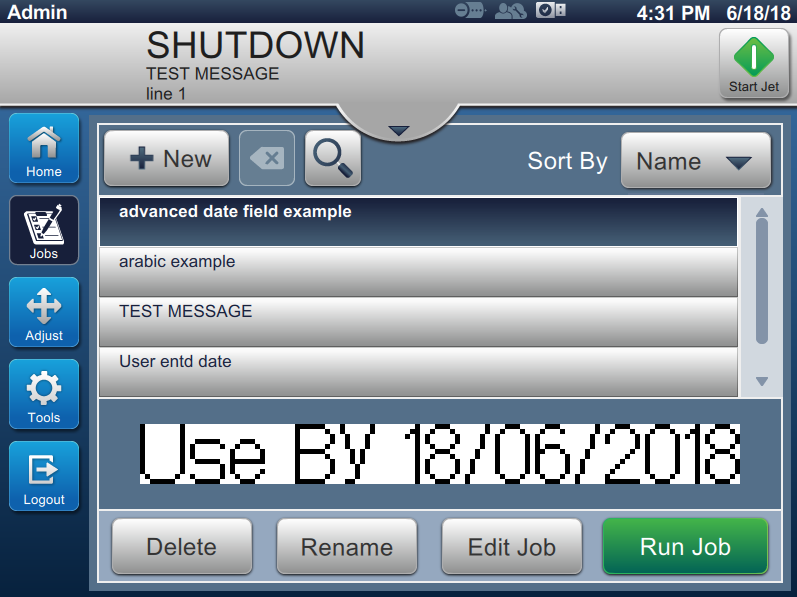
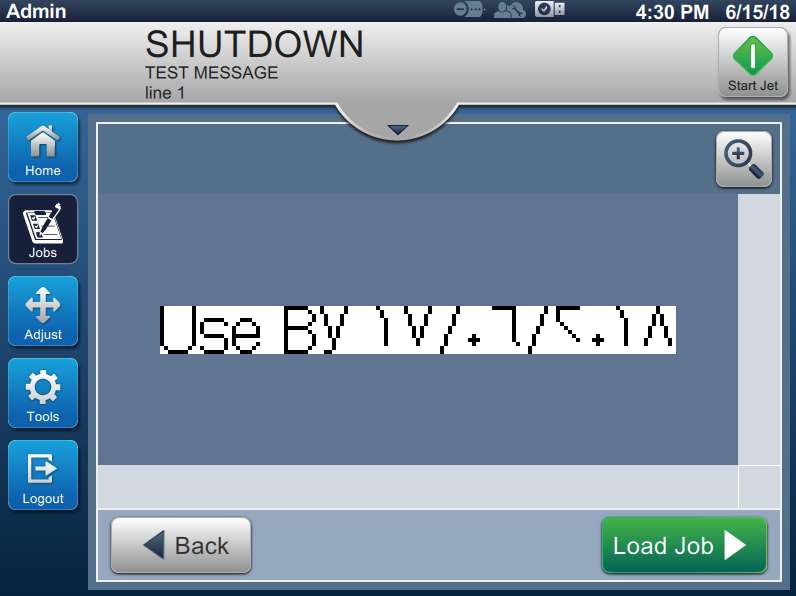
Turn on the printer. The printer will start up and on completion Home screen will be displayed. The printer will be in SHUTDOWN mode
(See the figure). |
|
23.
|
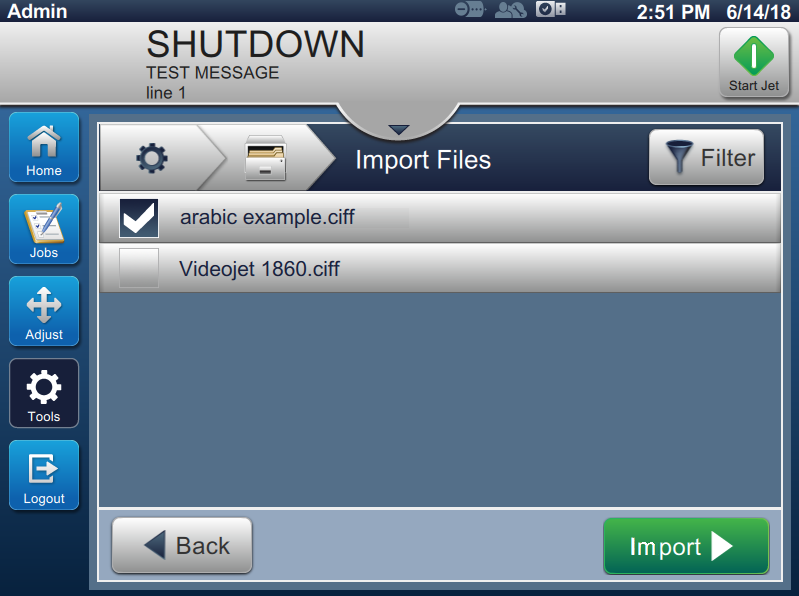
Login to the printer by selecting the required role and entering the password. Navigate to Tools > File Manager > Import Files. Select the USB device and touch Continue. Select the job file ‘User entd date’ and touch Import to copy the job file to the printer. |
|
24.
|
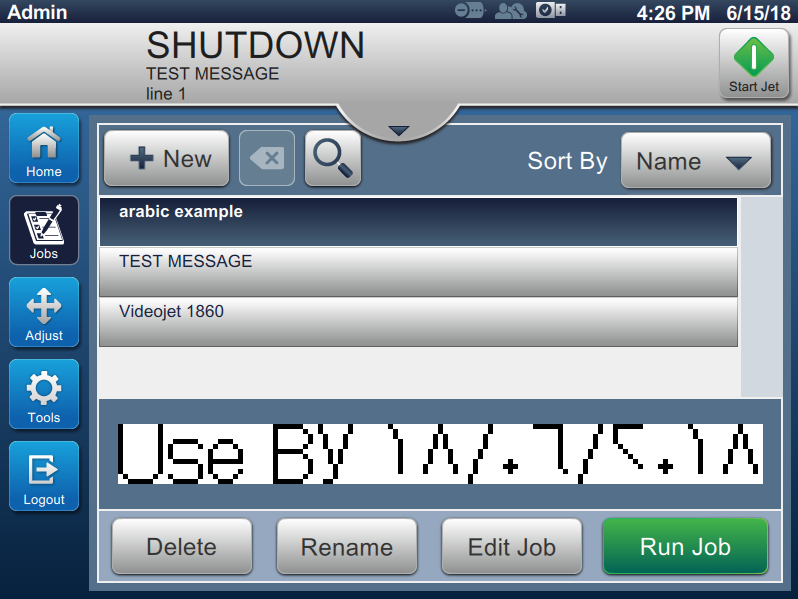
Touch Jobs and confirm the transferred job appears in the job select list. |
|
25.
|
Select the job and touch Run Job. |
|
27.
|
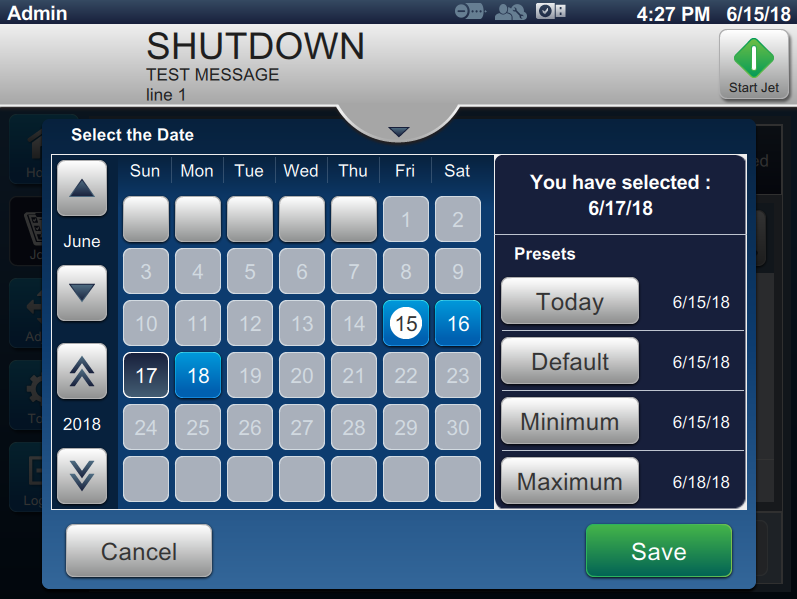
The calendar in the standard Gregorian format appears. Select the required date (17 in this example) and touch Save. |
|
28.
|
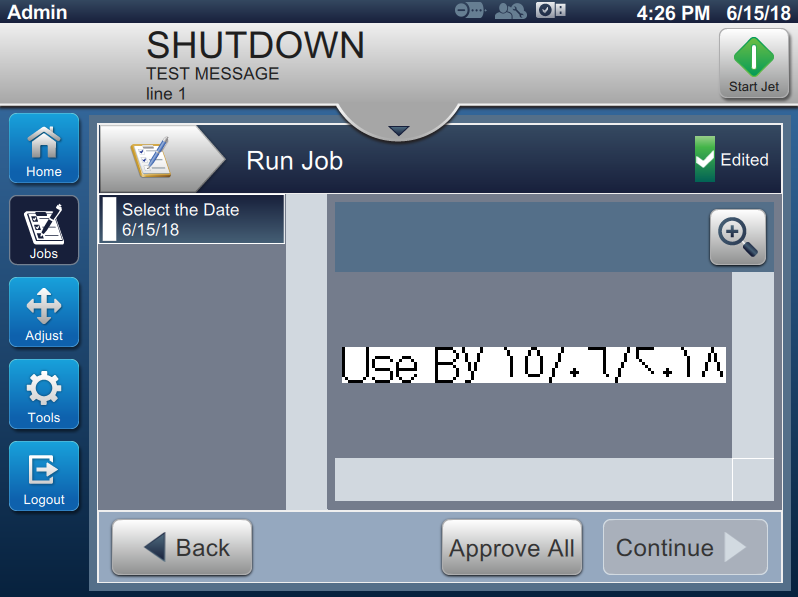
A tick mark appears with the prompt message. The preview is updated to reflect the selected date. Touch Approve All and then on Continue to display the next screen. The print preview is displayed. |
|
29.
|
Touch Load Job to close the preview display. The job is ready to be printed with Arabic dates. |
Back to Top